
Quality
Pick one of three presets with quality. When a preset is not enough,
advanced changes single settings, such as the number of samples or light
shining through glass.
Pick a preset
await render({ quality: 'preview' });- preview
- A quick look at roughly how the render will turn out. Fast and cheap, but grainy. Up to 32 samples, 1024px by default.
- studio
- The default, and the one the pricing page quotes. Good for product images, including glass, metal and glossy surfaces. Up to 256 samples, 2048px by default.
- ultra
- For the large hero image on your homepage. Takes around six times as long as studio. Up to 2048 samples, 4096px by default.
What each preset sets
| preview | studio | ultra | |
|---|---|---|---|
| Max samples | 32 | 256 | 2048 |
| Adaptive threshold | 0.08 | 0.02 | 0.005 |
| Max bounces | 4 | 8 | 16 |
| Diffuse / glossy / transmission | 2 / 4 / 4 | 3 / 8 / 8 | 6 / 16 / 16 |
| Default size, long edge | 1024 px | 2048 px | 4096 px |
| Quick preview first | no | yes, 24 samples | yes, 32 samples |
| Denoised | no | yes | yes |
samples is the most any pixel can get. A pixel stops earlier, as soon as it
is clean enough, and adaptiveThreshold sets how clean that is.
Advanced settings
Most scenes never need advanced. Every field is optional and overrides the
preset for that render.
await render({ quality: 'studio', advanced: { samples: 512, caustics: 'sharp' } });| Field | What it does |
|---|---|
samples | The most samples a pixel can get. The estimate prices it. |
adaptiveThreshold | How clean a pixel has to be before it stops. |
maxBounces, diffuseBounces, glossyBounces, transmissionBounces | How many times light may bounce. |
denoise, denoiser | Turn denoising on or off, and pick the denoiser. The estimate prices it. A denoised preview is the cheapest clean image there is, a little over a plain one. |
lightTree | Faster sampling for scenes with many lights. Chosen for you when unset. |
lightScale | One multiplier over every light in the scene. See Which lights render. |
caustics | Light shining through glass. See below. |
clampIndirect | A limit on how bright one indirect sample may be. Not set by default. See caustics in a video. |
shadowCatcher, shadowPad | The ground shadow under a product on a transparent background. |
viewTransform, toneCurveEmulation | Color management. See Environment & lighting. |
timeoutSeconds | Stop the render after this long, so it is never charged past it. |
Light shining through glass
Caustics are the light that reaches a surface through glass: the bright pool under a tumbler, or the ripples below a bottle. They are off by default. Without them glass casts a solid shadow, the same as in your Three.js viewport.
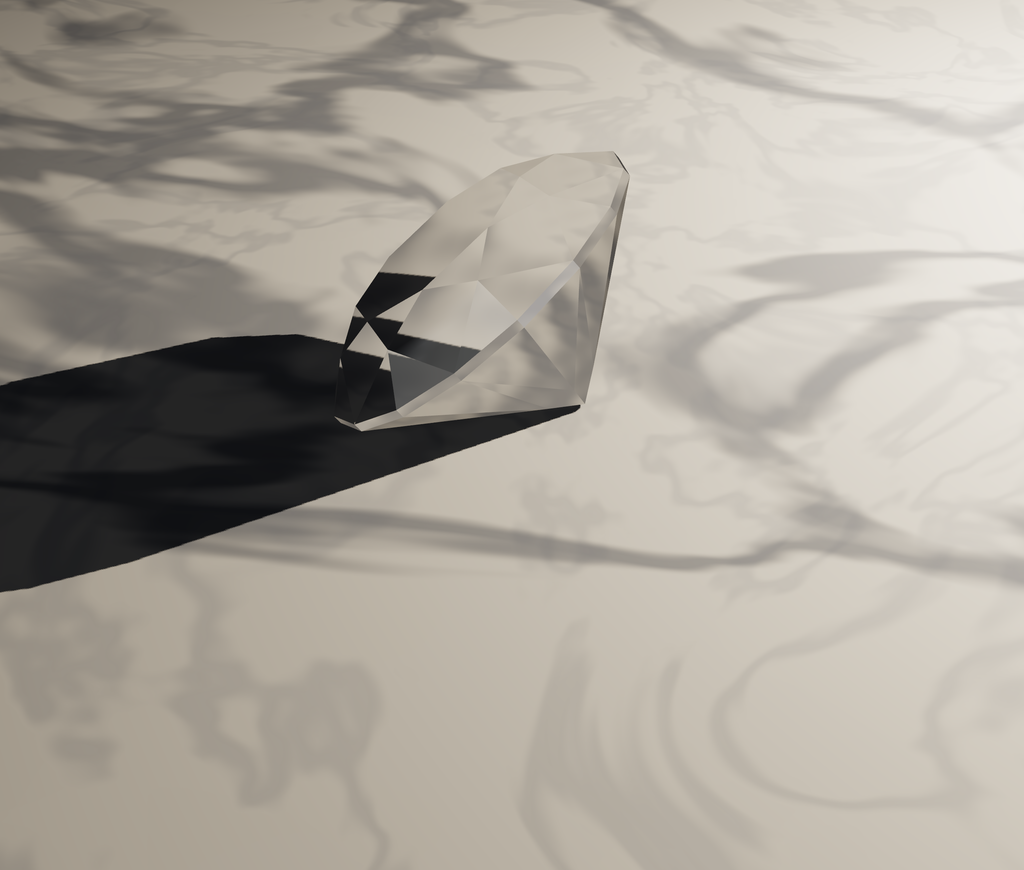
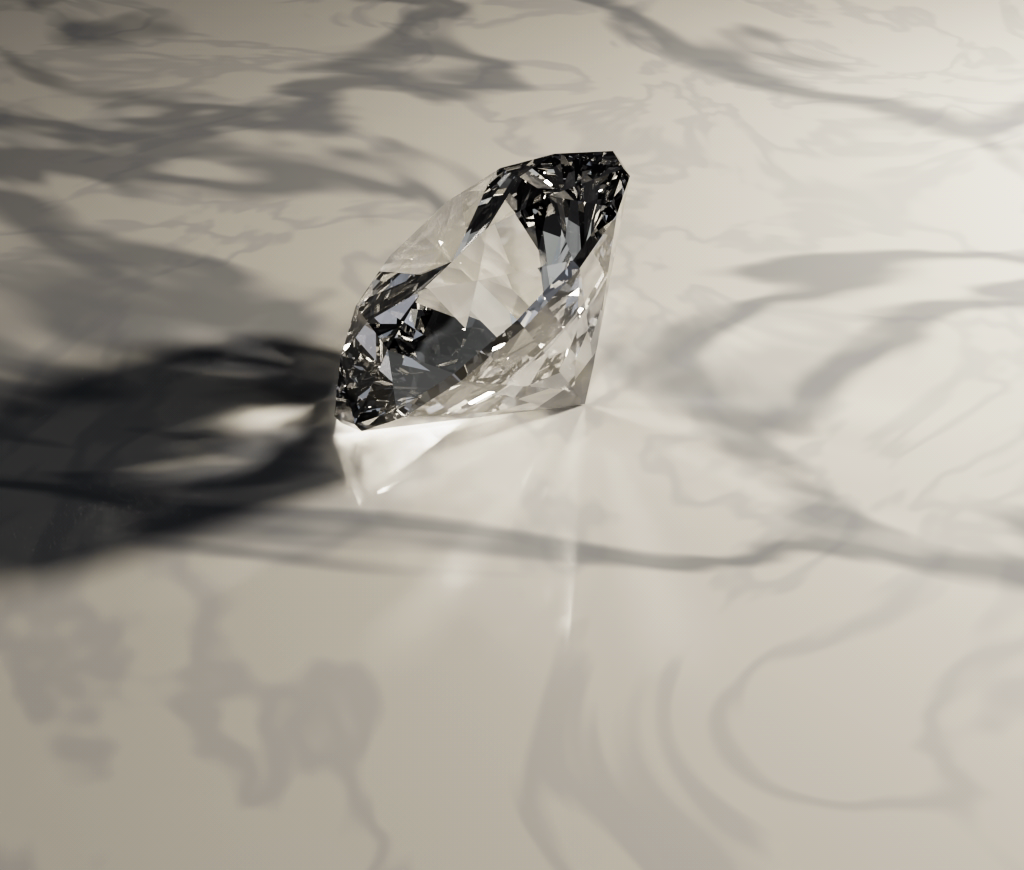
The viewport draws a pale solid and a black shadow. The trace follows the lamp through all fifty-seven facets and lays what comes out across the marble in front of the stone. Nothing in the scene says where that light should land. It is one setting: caustics: 'soft'.
1024×870·ultra preset·caustics: soft
await render({ advanced: { caustics: 'soft' } });| Value | What you get |
|---|---|
| not set | A solid shadow under glass. Fastest, and the same as your viewport. |
'soft' | Works for any shape and any light. It is slow to clean up: where the light comes to a focus it can still be blotchy at studio samples. |
'sharp' | A clean pool of light where 'soft' leaves blotches, at two to four times the render time. It only covers light that goes from a lamp straight through smooth glass. Everything else still goes the 'soft' way. |
One glass sphere over a marble floor, rendered three times. Only
advanced.caustics differs.
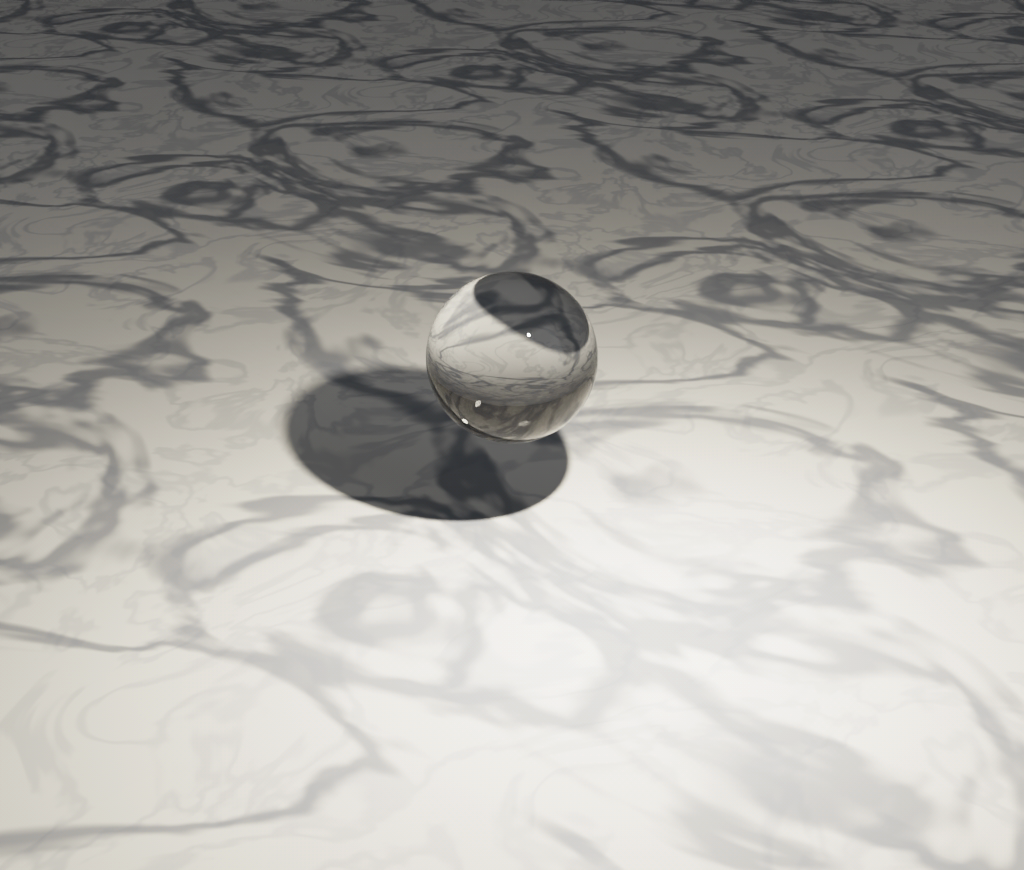 not set
1024×870·studio preset
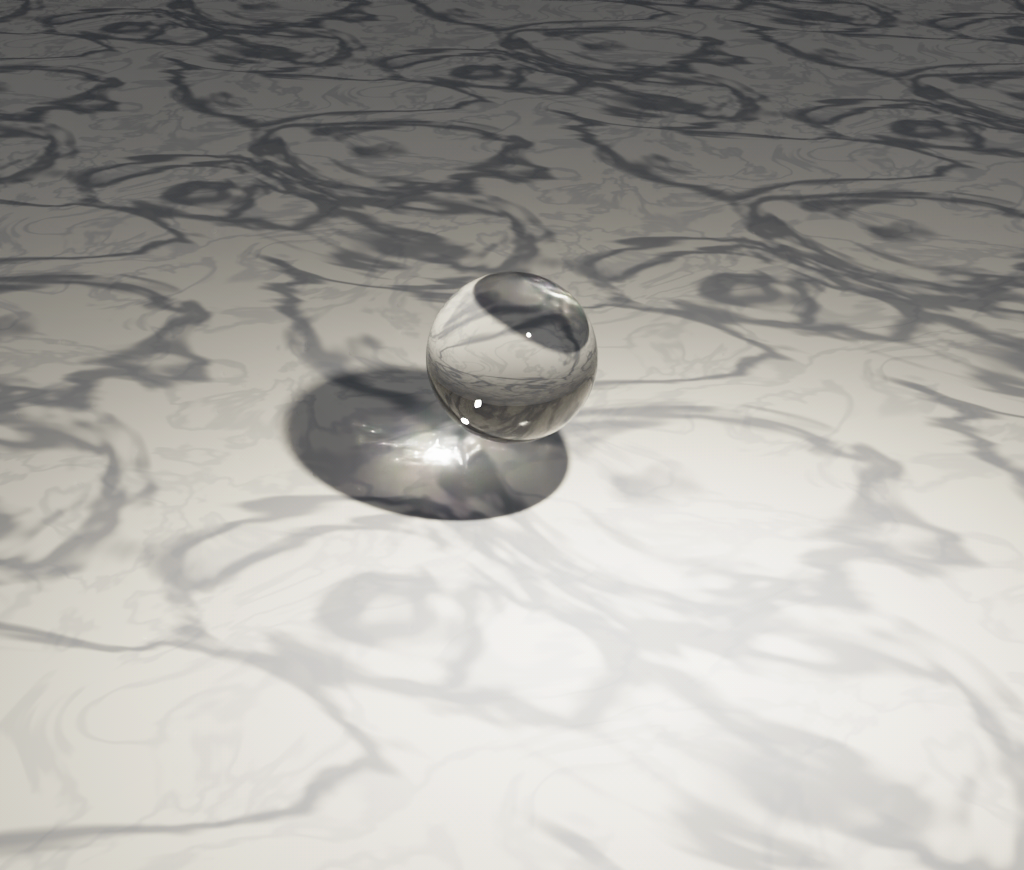 caustics: 'soft'
1024×870·studio preset·caustics: soft
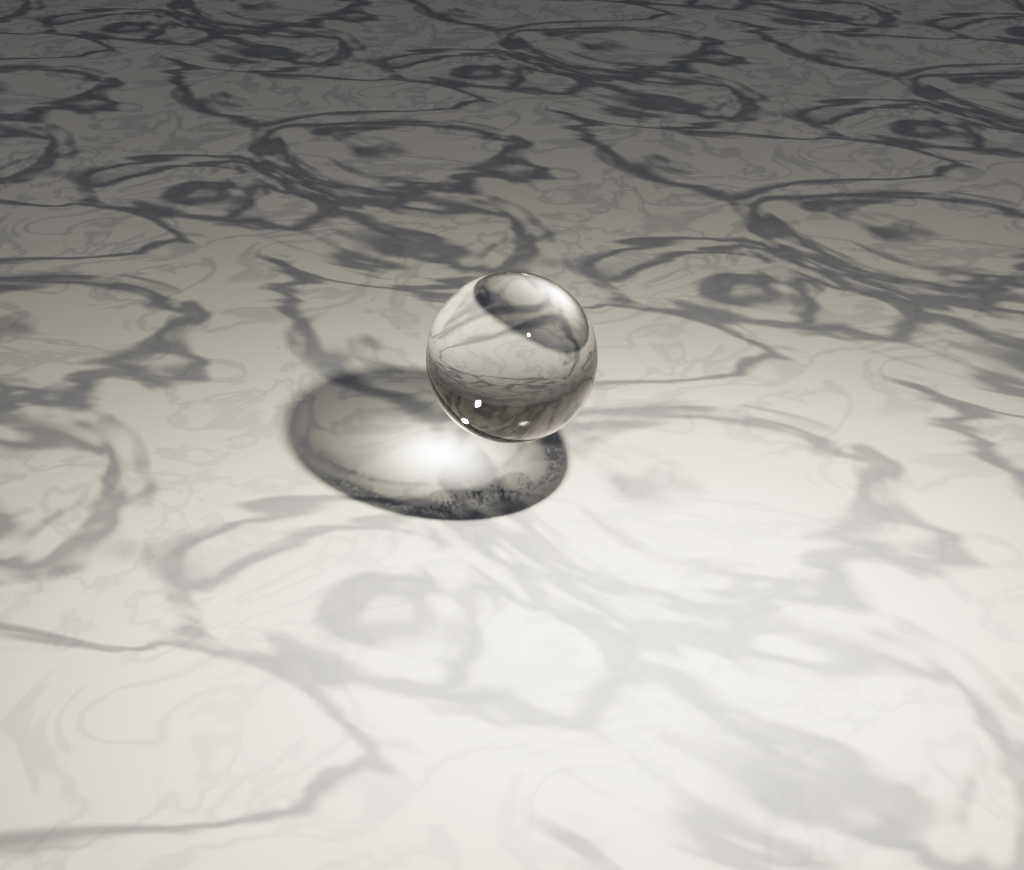 caustics: 'sharp'
1024×870·studio preset·caustics: sharp
Which one to choose
'sharp'for smooth glass under a small or distant lamp: a bottle, a tumbler, a lens, a sphere.'soft'for a cut stone. Under'sharp'a diamond comes back with no caustic at all, because the light bounces around inside the stone before it leaves. The diamond above is'soft'at 3072 samples.'soft'first when a large lamp stands close to a small object. It cleans up on its own there.- Light from an HDRI or from a glowing mesh always goes the
'soft'way, so a scene lit only by an environment gets the slow, grainy kind. - The rainbow a prism throws stays noisy with either value.
Set up the scene for a good caustic
Light the glass from behind or from the side. Glass throws its light forward, so a lamp next to the camera puts the caustic behind the product, where you cannot see it.
Give the light a surface to land on. On a transparent background there is no floor to brighten, and the light that lands inside the shadow stays grainy. Add a floor mesh to your scene, or use a color or environment background.
Caustics in a video
A caustic that looks fine in one image can flicker in a clip. More samples barely help. Two other things do:
await renderVideo({
  timeline,
  width: 1920,
  height: 1080, // render at twice the size you will publish, then scale down
  advanced: { caustics: 'soft', samples: 64, clampIndirect: 30 },
});| Change | What it did |
|---|---|
clampIndirect: 30 | Removes the rare, very bright hits that cause the flicker. Free. At 10 the clip is calmer still, and the pools of light are visibly dimmer. |
| Render larger, scale down | The biggest gain. 1920 wide at 64 samples costs about what 960 wide at 256 does, and is far steadier. |
| More samples | Almost nothing. Spend the budget on size instead. |
For the last of the flicker, run a temporal filter over the video before you scale it down. It averages each pixel with the same pixel in the frames around it, only where they barely differ, so moving edges stay sharp. With ffmpeg:
ffmpeg -i master.mp4 -an \
  -vf "atadenoise=0a=0.06:0b=0.12:1a=0.06:1b=0.12:2a=0.06:2b=0.12:s=9,scale=1280:720:flags=lanczos,format=yuv420p" \
  -c:v libx264 -preset slow -crf 20 -movflags +faststart clip.mp4
For a clip that loops, wrap it first so the filter can see across the seam. The looping caustics tutorial shows how.
Leave clampIndirect unset for a single image. There the caustic should be as
bright as it really is.